Role User Guide
Patient App Guide
Book appointments, start emergency video triage, request ambulances, and track active care.
Login URL
/patient/auth
Start URL
/patient/dashboard
Onboarding and Login Flow
- Open the patient app from /patient/auth.
- Sign in or register with the patient mobile number flow.
- Complete profile details, saved address, emergency contact, and notification permissions.
- Use the bottom navigation for Home, Visits, Emergency, and Profile.
Quick Start
- Use Home for active emergencies, top doctors, hospitals, and upcoming appointments.
- Use Book Appointment to select a medical service, select a doctor, choose video or hospital visit, and confirm a slot.
- Use Emergency for video triage or ambulance dispatch with current GPS pickup.
- Use Profile to maintain address, records, emergency contacts, and app install preferences.
Menu Navigation Hierarchy
Follow this order during training so users understand the dashboard before action-heavy screens.
1Home
2Visits
3Emergency
4Profile
5Book Appointment
6Ambulance Tracking
Each Module: Navigation and Actions
| Navigation | Function | Primary Actions |
|---|---|---|
| Home | Patient dashboard for active emergencies, upcoming appointments, doctors, and hospitals. |
|
| Book Appointment | Service and doctor selection for scheduled consultation. |
|
| Emergency | Urgent care entry point for symptom category, video triage, and ambulance request. |
|
| Ambulance Tracking | Live tracking screen after a request is accepted. |
|
Action Screens with Screenshots
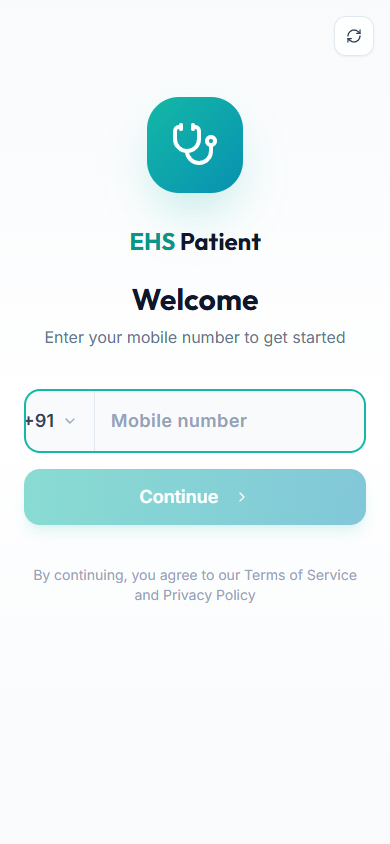
Step 1: Patient Login
The patient starts from the mobile-first auth screen before accessing appointments and emergencies.
/patient/auth
Enter patient mobile or auth details
Complete verification
Allow notifications when prompted
Step 2: Schedule Appointment
The appointment flow starts by choosing a medical service, then moves to doctor and slot selection.
/patient/book
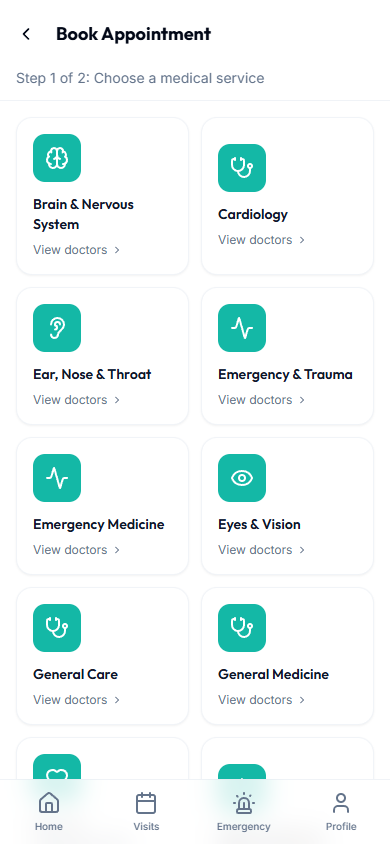
Select service
Open doctor list
Book slot
Watch Visits for status updates
Step 3: Emergency Category
Emergency care starts by selecting the symptom category so the system can route the request.
/patient/emergency
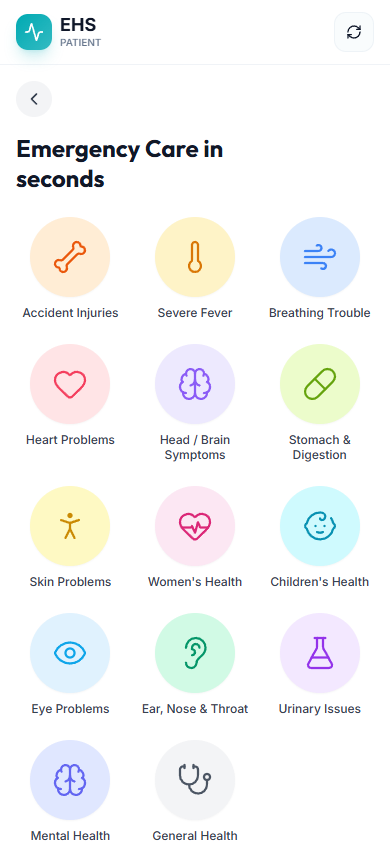
Choose symptom category
Continue to video or ambulance options
Step 4: Ambulance Request
The ambulance path captures pickup location, destination hospital, ambulance type, and count.
/patient/emergency/heart-problems
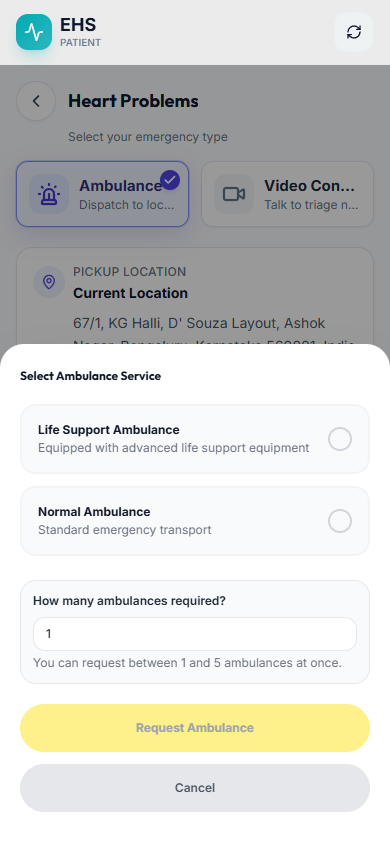
Confirm GPS pickup
Select normal or life-support ambulance
Submit request
End-to-End Testing Checks
- Patient can open /patient/auth and complete auth in a real test environment.
- Appointment service list loads from active medical services.
- Emergency category opens both video and ambulance branches.
- Ambulance request requires pickup coordinates and ambulance type before submission.